July 22, 2001 (Sunday)
The radio I ordered for my R1150RT finally came in last week. I tried to order the bike with it installed, but the radios weren’t available when I first picked up the bike. When CalBMW called to say the radio was in I asked how hard it was to install: they didn’t know. The service department didn’t know, either. I decided I’d try to install it myself, but scheduled an appointment “just in case”. I’ve got ‘til Aug 8th to figure out how to do it myself.
I figured the hardest part would be installing the remote display because after all, the bike is pre-wired for the radio. Hah!
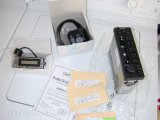
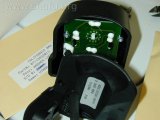
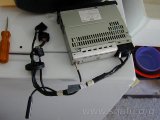
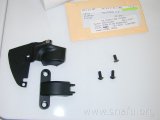
Radio parts
This is what you get for around $1000 dollars list. This is exactly what you get… the radio wasn’t in a box. There are no installation or operation instructions, only a product registration card. The radio is made by Clarion. The yellow envelops contain some mounting hardware. More on that later.
accessories
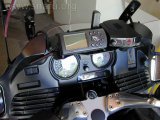
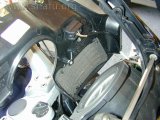
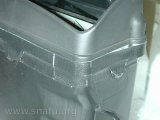
windshield removed
accessory shelf removed
My bike has the RCU accessory shelf for my GPS and radar detector. I removed the windshield, clipped the cable ties holding the power wires, and then removed the shelf. The screws that held the shelf had to come out to remove the top part of the fairing.
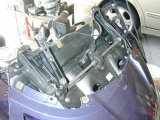
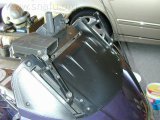
top part of fairing removed
The top part of the fairing was held on by 4 screws in the front of the bike. The top lifts over the windshield support arms. The wires by the left arm (right side of picture) are power for my GPS and radar detector.
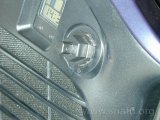
light adjustment nob
instrument cover side screws
right side of bike
I removed the headlight adjustment nob, but that turned out to be unnecessary. The side mirrors were popped off to get at the side support screws. Once the screws at the side, top, and bottom were removed I could pull the part of the fairing that covers the instruments back. I decided I didn’t need to remove it all the way, so did not remove the headlight adjuster on the right side.
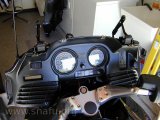
left side of instrument cover
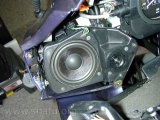
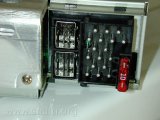
left speakers
The left side of the instrument/speaker cover could be pulled back quite a bit by removing the wire to the fog light switch. This let me swing the instrument/speaker up to get to the pannel where the radio display is mounted. The second picture shows what the speakers look like.
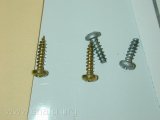
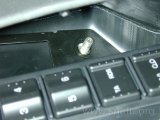
new screws
Back of display unit
One of the yellow envelopes contains the screws on the left. They are slightly longer than the screws that held the dummy cover over the display slot. Another envelop contains two wavey spring washers. I used the new screws and washers to mount the display. The RID is mounted the same way.
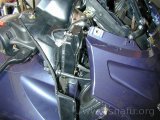
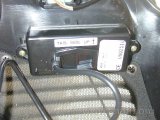
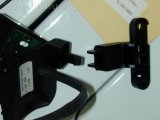
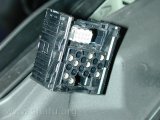
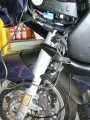
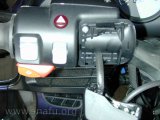
remote unit
T
Control lead access
Looking closer at the remote I see that the body is in two pieces… No, make it three. I can see how the top part of the bracket mounts, but there doesn’t seem to be a screw that matches one of the holes on the bottom “T”. Also there is a wire right next to the screw. The “T” has a slot for the wire, but I wonder how much I need to disconnect to get it attached. The final kicker is that I don’t know and have yet to figure out how to take apart the housing. That means I’ll wait on this and move over to installing the radio.
bag, side cover, and seat removed
side panel removed
A little bit of playing will show that it is impossible to get the radio into its compartment with the compartment on the bike. OK. The bag, side cover, and seat are removed, followed by the left side pannel. One of the operator manuals has the instructions if you’ve never done it before.
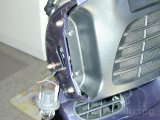
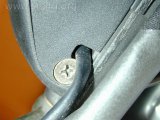
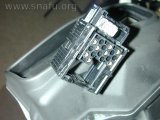
top mounting hole
mounting post with 9mm nut
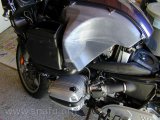
The radio box is held on by the two allen screws that hold the air pipe, 2 other allen screws with one of them on the back side of the box, and a 9 mm nut that you access from inside the box. The first picture shows the hole where the bolt goes inside the box. The second picture shows the nut on the bolt coming out of the gas tank.
control lines
Once the radio box is out you can find the pig-tails for the display and the remote control.
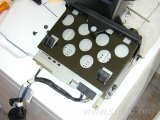
radio box top/bottom joint
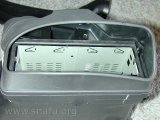
See that pretty tape covering the seam between top and bottom half of the radio box. It has to come off. If you’re careful you can lift off the bottom part of the tape, loosen the three screws, and then pull the cover off and put it aside. The remove the three screws and pull the radio frame out of the box. This radio is not intended to be a quick disconnect. Removing the frame makes it much easier to install.
radio
connector, locked position
connector, unlocked position
The first picture shows the bottom of the radio. The second and third show the connector in its locked and unlocked position. The connector needs to be unlocked, attached to the radio, and then locked. Its easier than it sounds.
radio with control lines
radio in frame
wires through grommet
The control and antenna connectors are attached to the radio and then the radio is slid into its frame. Before putting the frame in the box I had to cut another access hole in the grommet/seal. There are 4 holes. The center is for power and speakers. The three outside holes are for antenna, display, and remote.
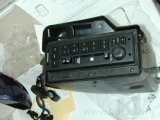
radio in box

ready to put back on the bike
The radio and frame slide into the box and are held in place by three screws. The screws are left loose until the box top is installed, then snugged down. The tape I carefully folded out of the way when removing the top was still usable, so I folded it back down in place. Looks OK.
box on tank screw
wires to radio
wire close-up
The box went back on the bike. The excess antenna wire (2nd picture) goes inside the box. The 3rd picture shows something that looks like two telephone jacks. That’s where I put the power distribution box for my GPS and radar detector. Of course, it’s slightly in the way, now.
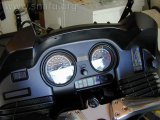
dash wiring
instrument cover in place
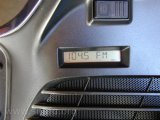
The radio works
The fog light switch was wired up and the lead from the LCD routed behind the speaker and down to the junction. Cable ties make it look pretty. The instrument cover is put back and screwed in. The radio is turned on. It works. I just need to figure out what some of the buttons mean.
toys re-installed
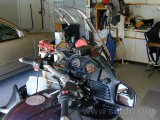
windshield re-installed
I’ve run out of time, today. The top part of the fairing and my GPS/radar detector are re-installed followed by the windshield. I’ll take a look at mounting the remote, tomorrow. I did plug the remote in and verify that it works.
Jul 23, 2001 (Monday)
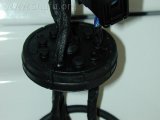
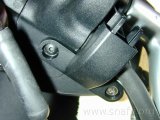
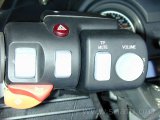
bottom remote mounting bracket
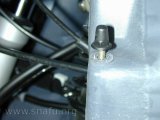
I removed the bottom plate of the clutch lever housing to better see how the remote bracket was supposed to be attached. One side There are two screw holes for mounting the bracket – only one is used without the bracket. The kit came with two replacement screws (labeled R11RS windshield screws).
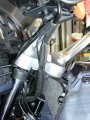
bracket on bike
This is the bracket mounted on the bike. The philips head screw was replaced after this picture with the correct screw.
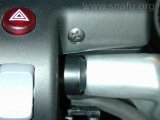
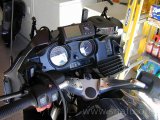
the remote goes here
The remote housing is supposed to clip onto the bracket and attach to the top of the clutch housing using a screw. However the existing screw is too short and a replacement did not come with the radio. Looks like I won’t get to mount the remote until I get to a hardware store.
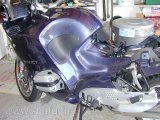
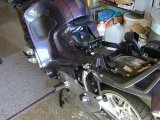
ready to ride
The fairing was replaced and the bike made ready to ride. I’ll have to remove the fairing again to route the remote wires, but that only takes a few minutes. The radio works quite nicely… I just have to control it from the main pannel. I’m using one of the many spare keys I got to make this an easy task until I get the remote mounted.
July 26, 2001 (Thursday)
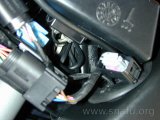
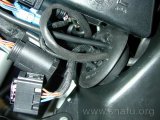
remote back plate
remote
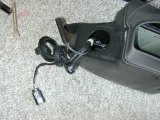
The first pic is slightly out of focus, but you can see where the 4mm screw holds the remote back plate to the top of the cluch fluid reservoir housing. The bottom of the back plate snaps into the bracket I installed Monday.
The remote snaps over the back plate and is held in place by a screw at the bottom – I think. I can see the screw hole, but did not receive the screw.
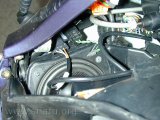
wiring
I routed the remote cable next to the existing cables, adding more cable ties as needed. Cable ties are cheap; I used a quite a few.
remote connector
There is quite a bit of excess wiring. I pulled the grommet out of the radio box and, after making the necessary connection, stuffed the connection and the spare cable into the radio box through the grommit. The grommit was snapped back into the radio box. It looks clean. Of course it’s hidden by the fairing side anyway.
That’s it. The radio works fine, although the remote only seems to control the volume when using the tape. I’m going to bug my dealer for the operating doc that is supposed to come with the radio to figure out the finer points. It sounds fine (for a radio on a motorcycle that is listened to in the wind with full face helmet and ear plugs).