1999 December 13 (Monday)
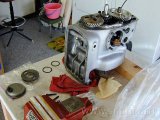
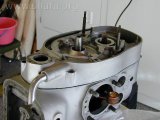
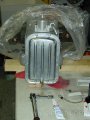
It’s been 9 months since I worked on the engine. Now that the front wheel is back on the bike it’s stable enough to install the engine so I will finish putting it back together. Before removing the plastic cover I decided that the garage needed cleaning – that took up all of the morning. Once the garage (and my work area) was clean I fired up the oven and start getting the the timing cover and timing gear front bearing warm.
Timing gear bearing
Timing gear bearing
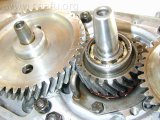
Bearing close-up
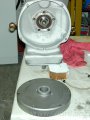
The warm bearing slipped over the front of the crankshaft. Somehow, I never purchased a replacement bearing. I cleaned and inspected the original bearing – no problems found so I decided re-use was OK.
Crankcase breather valve
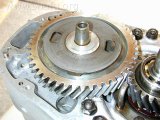
Crankcase breather valve
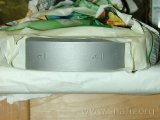
Timing case cover gasket
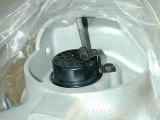
While waiting for the bearing to cool I mounted the breather and prepared the timing cover gasket. I know it’s not necessary, but treated both sides of the gasket to a very thin coat of Hylomar.
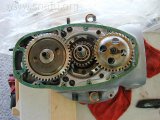
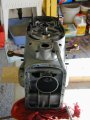
Install timing case cover
Timing case cover
I lightly oiled the the face of the breather valve before the timing gear cover was removed from the oven and put in position. It took a few raps of a mallet over a 2x4 to get the cover to seat properly. I then used some Hylomar on the threads of the bottom 6 screw when fastening the cover to the case. The holes for those 6 screws go through the case and I don’t want any oil leaks.
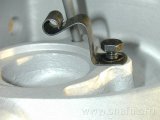
Oil pick-up filter
Oil pick-up filter
While the cover was cooling I added the oil pick up. Once the cover cooled I inserted the oil seals for the crank and camshaft openings. That’s all for this day. I covered the engine back in plastic to keep things clean.
1999 December 15 (Wednesday)
I was busy all day yesterday and had to go into the city this afternoon, so not much was done.
Oil pan magnets
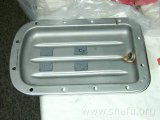
Oil pan w/magnets
Before I finished up on Monday I mixed up some JB Weld and attached some magnets to the bottom of the oil pan. I don’t remember who first suggested this, but it seems like a good idea. With the JB Weld they are not going anyplace.
Updated June 2000: Wrong. The JB Weld dissolved (apparently without causing any problems). This was discovered during the 1200 mile service. I suspect I had a bad batch of JB weld as I had other epoxy failures with that batch, too.
Install oil pan
Oil pan gasket
Oil pan installed
I cleaned the flanges on the oil pan and the bottom of the engine with acetone, then added a thin layer of Hylomar to the gasket and mounted the oil pan. Since the screws go through the block and into the sump, I used Hylomar on the threads, too.
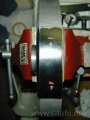
Flywheel preparation
Flywheel
Flywheel markings
Before I install the flywheel I want to make it easier to see the timing marks. To do this I masked off most of the flywheel, but left an area from just above the OT to just below the F. That area was painted black out of a rattle can.
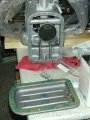
Air filter insert
Air filter insert bracket
Air filter insert
While waiting for the flywheel paint to dry I cleaned up the air filter insert and its mounting bracket and then installed them. The rubber (?) gasket under the filter insert was pliable enough to re-use.
Flywheel markings
Painted flywheel markings
I’ve run my errands and the paint is now dry. To make the marks easy to find I first used some acetone to wipe away the paint above the OT mark. Thus, the top of the dark area is right at TDC. I then used a scribe to scratch the paint out of the S and F marks along with their identifying letters. Finally I used a touch of some bright red nail enamel to highlight the marks. I’ll let it dry overnight before going any further.