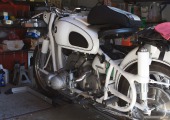
Friday, May 1, 2009 [17433 miles]
Something missing
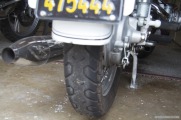
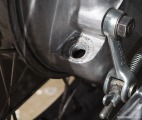
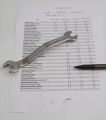
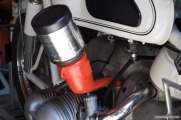
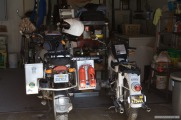
Several weeks ago, on the way back from Darryl’s Surf City Tech Day the right hand muffler came off of the bike. The sad thing is that although I knew something had happened, I wasn’t exactly sure what until maybe 20 miles later. I re-rode the route the next day, but didn’t see anything shiny along the road. Ok. I ordered a replacement.
Something different
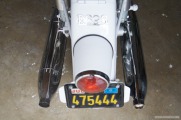
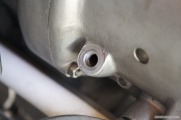
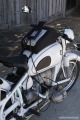
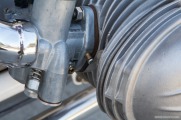
Notice something different? Among the choices for replacement mufflers were seam and no seam. When I read that I was picturing a seam the length of the muffler which mine didn’t have so ordered the no seam version. Ooops. What to do. I liked the look of the no seam so ordered a replacement for the left side, too. It arrived about an hour after taking this picture.
Saturday, May 2, 2009 [17433 miles]

New left muffler
I installed the left muffler that matches the right this afternoon. The muffler that was on the bike is now clean, polished, waxed, and put away in the same wrapping and box that contained the new muffler. Not quite sure what I’ll do with it. It does look better when both sides match.
Tuesday, June 9, 2009 [17589 miles]
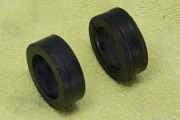
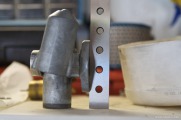
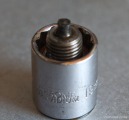
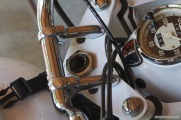
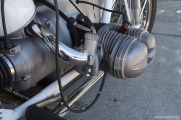
Vibration damper springs
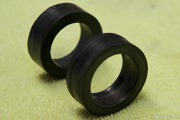
Note wear in used spring
When I pulled into the garage after riding home from Vasona Park I noticed a metalic tapping that sounded like it was coming from the front of the bike. I pulled the cover and didn’t see or feel anything obviously wrong.
The vibration damper might have been a bit loose. It’s hard to tell when only going from memory.
I had a spare “spring” and decided to swap it out with the rubber spring that has been in the bike for the last 8 years. The pictures show the difference between the old and the new. What the pictures don’t show is how the old spring felt. The inside diameter was slightly mushy, more like a very soft rubber than the hard rubber of the replacment spring.
I hope that was the problem. I haven’t given the bike a test ride yet to be sure.
Monday, Aug 17, 2009 [18018 miles]
18,018 miles
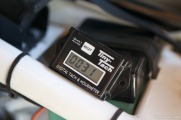
31 hours
I went over 18,000 miles going to breakfast this weekend. That means it’s time to start the service. This service is more than a simple oil change. I’m using the 3600-mile column from my service schedule checklist (PDF) that I created to make sure I don’t forget anything.
As the second image shows, the engine has 31 hours since last service. I’ve noted before that my 1,200 mile service schedule is typically about 30 hours of run time.
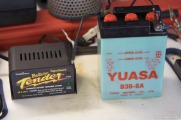
Fluid levels OK
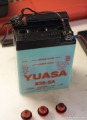
I took the battery out of the bike to check the levels. It is very hard to see through the dark case, so I popped the caps off the cell and was initially shocked to see the fluid level so low. Then I looked at the front of the case and noticed that when filled to the upper mark the level will still be down quite a ways from the caps. I topped off the cells and put the battery on the charger.
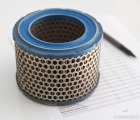
Air Cleaner OK
FD Fluid level OK
Checking drive shaft fluid level
Tranny fluid level
The afternoon sun is going to drive me out of the garage, soon, so I won’t be doing too much this afternoon. I checked the air cleaner and fluid levels. You can’t tell from the pictures, but the fluid in the transmission and final drive look clean, not dirty. The screw driver I used as a dip stick in the drive shaft showed that there was still some oil there, too.

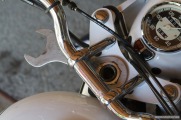
Oiling brake linkages
Oil fender hinge
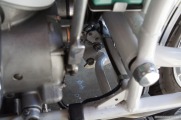
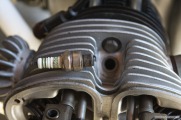
Cylinder base nuts OK
I oiled the brake and clutch linkages as well as the rear fender hinge. Cables look and feel good. Both wheels were given a good shake… no movement detected. The rear swing-arm doesn’t have any side-to-side play and the gap looks even on both sides. Finally I checked the cylinder base nuts. They were still nice and tight. That’s pretty much it for today.
Battery charged
As I was cleaning up and putting stuff away I noticed that the charger is telling me the battery is fully charged. It was on the charger less than an hour. That is indirect evidence that the battery and my charging system are working well.
Tuesday, Aug 18, 2009 [18018 miles]
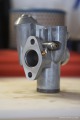
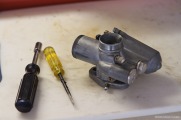
Right carb removed

Ready for cleaning
Today I took the carbs off the bike for cleaning. I started with the right carb (working on only one carb at a time). All the jets were removed, sprayed with carb cleaner, and blown dry with compressed air. A loupe shows the various orifices to be clear.
The same procedure (carb cleaner and compressed air) was used on the carb body.
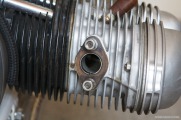
Not flat
Flat
I used a parallel to check the flatness of the carb mounting flange. It’s hard to tell looking at the picture, but when the parallel was held to the flange and held up to a light source it was quite obvious that the flange was not flat. A couple minutes of figure eights on extra fine sand paper fixed that.
Back on bike
Left carb
I put the right carb back on the bike and did the same cleaning and checking on the left carb. It was in roughly the same shape as the right carb, including the slight bit of mounting flange warpage. I also noticed that next time I take the float bowl top off I’ll need a new gasket.
I added carb gaskets to my “need to buy” list.
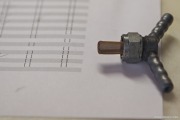
Clean filter
My final job this day was removing the bottom of the fuel petcock and checking the in-line filter. It was clean. I put the petcock back together and re-connected fuel lines. I also reconnected the air intake pipe and put the air filter back on the bike after cleaning the filter housing. Maybe tomorrow I’ll work on valves.
Wednesday, Aug 19, 2009 [18018 miles]
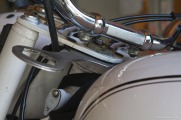
Bike in Condor stand
Center stand pivots
Today I started by moving the GS and putting the R69S in
the condor wheel stand so I could have easy access to the side stand and
center stand pivots for lubrication.
I also, of course, wiped off the center stand, bottom edge of the fender, lower parts of the frame, and other parts of the bike that get dirty from the oil mist that comes out of the engine breather.
Two slivers
Dirty oil
Clean oil
There wasn’t much sludge on the magnetic drain plug (sorry
for the blurry image) but I did find two slivers of metal. That will
bear watching. The oil was dark, but I know that in itself doesn’t mean
much. I’d need to send it off for analysis if I wanted to know more.
I’m not that interested.
I took the bike out of the Condor stand and put it back on the center stand so I could removed the front cover in preparation for adjusting the valves.
Spark plug
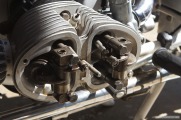
Valve adjust
The plugs on both side measured .7 mm. I adjusted the gaps closer to the recommended .6 mm. On the left side I didn’t check the valve lash until after retorquing the heads. Both were slightly tight at .005” intake and .007” exhaust. I set them to the recommended values.
I checked the valve clearance on the right side of the bike before retorquing the heads. The intake was tight at .005” but the exhaust was loose at .009”. After retorquing the heads The intake stayed the same but the exhaust tightened up to .007”. Again, both were set to the recommended values of 0.006” intake and 0.008” exhaust.
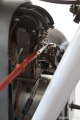
Thursday, Aug 20, 2009 [18018 miles]
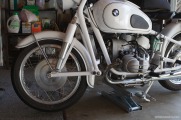
Raise front end
I had a bit of front end wobble. I adjusted the bearing pre-load a while back, but it didn’t seem to hold. I put the bike on the scissor jack to get the front end off of the ground so I can check it again.
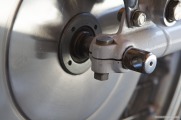
Steering stem upper nut
It was not very tight
tighten bearing preload
The top, upper steering stem nut was not very tight, again. I seem to have a problem getting this nut to stay tight. The preload was loose, not enough to feel any play in the front end, but enough that it took a 1/4 turn of the lower nut before I felt any drag in the steering. I set it to just before there is drag and then made the upper lock nut good and tight. Maybe this time it won’t come loose.
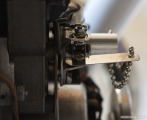
Adjusting points
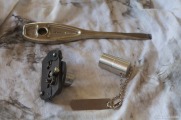
Advance, points adjustment tool
Static timing
This is the first time I’ve used the points adjustement
tool I bought a while back. It makes the job quite easy. Wish I had
bought it earlier. The advance still has a film of grease on the cam.
Good. I put the advance back on the bike and checed the static timing.
It was right at the S mark; no further adjustment needed.

re-connect ground
Rust!
After re-connecting the battery ground I checked the lights and the horn. They work. I also checked all fasteners. When looking at the front pinch bolt I notices rust on the front axle. It was re-chromed 10 years ago. It may be re-chromed again sometime in the future.
Dynamic timing
The bike started on the second kick. After a slight warm-up I clipped the timing light onto the spark lead and saw that the timing was advanced a bit. It only took two tries adjusting the points to get the idle at the S mark. At RPM the advance was going past the F mark. I adjusted the stop screw (it had been backed off earlier) until all was well.
Ready for road test
The bike is ready for a test ride to get it up to operating temperature and then some final carb tweaking. I’ll try to get that done tomorrow so the bike will be ready to ride this weekend. Even without carb tweaking I can tell that it is idling smoother that it was before the service. It sounds better, too – but that might be my imagination!
After test ride
Carbtune connections
After a 12-13 mile test ride I hooked up the carbtune for the final adjustments of the service. The bike didn’t feel bad, so this was more to check things out than to make any drastic changes.
Service done
Ready to ride
I am terrible at carb adjustments, but think I got the idle air a bit better than it was. The idle balance was off slightly; it is fixed. The off idle balance was fine, so I left the cable adjustments alone.
I put the carbtune away and tackled the hardest job of the service… putting the plug screws back in the vacuum ports. That’s it for this service.