Launching the application
GeoTag is launched by clicking on its icon in the dock, double clicking on its icon in the Applications directory, or selected one or more image files and then control or right clicking then selecting Open With GeoTag.app from the pop-up menu. Using Open With will launch the application and open the selected images.
GeoTag at launch
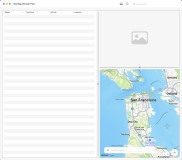
Upon startup the initial window looks like this (click on the thumbnail for a full size image). If the application was launched using Open With the selected images will be listed in table on the left side of the window. The left side of the window is a table of images to process. The upper right side of the window will show a thumbnail of the “most selected” image. The bottom right side of the window contains a map view.
The inspector button in the upper right of the title bar is new in version 5.2.
When an image in the table is selected its thumbnail will appear. If the image has geolocation data a pin will be placed on the map. If the pin is not in the current map view the map will center upon the location using the current zoom level.
The map can be displayed as shown (Standard), as a satellite view (Satellite), or as a combination of the two (Hybrid). The map is positioned by panning and zooming using standard Mac mouse and trackpad gestures. The current map type, location, and zoom level can be saved as the default starting location by hitting the Save Map Layout button.
There is a search bar at the top of the map. An address or partial address can be entered into the bar to set the map location. Cairo will center the map on Cairo, Egypt. Cairo Il will center the map on the city in Illinois.
The divider between left and right can be dragged as desired. So may the divider between top and bottom of right side.
First time launch
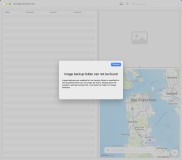
When GeoTag is launched the first time a notification is presented informing you that a backup folder should be selected.
First launch display
GeoTag will not update image files unless it can first make a back up of the file unless configured to ignore backups. This is done just in case something goes wrong during the update. It is recommended you create a folder in the Pictures folder named Backups and select that folder for backups.
The backup folder is required unless the “Disable Image Backup” is checked in Program Settings. If that option is not checked and a backup folder is not configured or if the configured folder does not exist when GeoTag starts the program will show the pictured notification.
When backups are enabled (recommended) before saving geo-location data to an image a copy of the un-edited image is placed in the backup folder. If an image of the same name exists in that folder a numbered suffix will be added to the name. The name with the highest numbered suffix is the most current backup (usually). If in doubt check the timestamps of the file. If for any reason the image file can not be copied to the backup location geo-location information will not be saved. Better to be safe than sorry.