Tuesday, Jul 20 2021
I sometimes shoot film. Always black and white which I develop myself. Once the negatives are in hand I convert them to digital for final processing. The “convert to digital” has meant using a flat bed scanner with various aids to scan the negatives. Once scanned I use my photo editor – curently Lightroom Classic with the Negative Lab Pro plug-in,i was using Capture One when this was originally written – to convert the negative to a positive and apply whatever edits I feel are necessary to make a decent image.
I’ve also used the scanner to convert boxes full of family photo negatives taken between the ’50s and ’90s. I mostly get usable results, but find that the process is quite slow.
An alternative to using a flat bed scanner is to shine a light source through the negative and take a picture of the negative with a DLSR. This can go quite fast given a good light source and a way to hold the negatives flat. You also need either a macro lens or extension tubes to use with a normal lens so you can focus at a distance where the image of the negative fills the viewfinder.
To hold the film flat I recently purchased the Essential Film Holder (EFH) which includes masks for 135 and 120 film, the two sizes I shoot. For a light source I use a Viltrox L116T LED light panel which is almost the perfect size for use with the EFH.
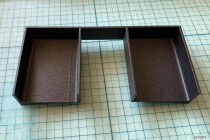
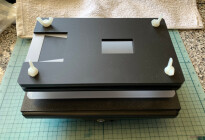
Stand
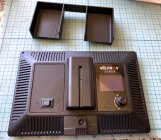
Stand with light source
It fits like this
I designed and 3D printed a stand to hold the light panel stable on my desk. The panel can move toward the front as I left that end of the stand open to access the light panel power switch and intensity control. A dab of gaffers tape keeps the stand in place.
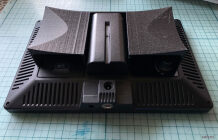
Light source
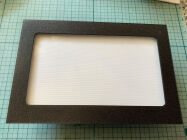
Light source with mask
As noted, the light source is almost the perfect size. It is actually a touch too big. There is a light path around the EFH when it is on the panel. That unwanted light is aimed directly at the camera. I 3D printed a mask to block that light. It also helps keep the EFH centered on the light panel.
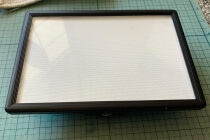
Ready to "scan" negatives
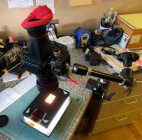
How it looks in use
This is how it looks set up to scan 135 negatives. The camera is held on a Manfroto magic arm clamped to my desk. I trigger the shutter with a remote so I dont induce camera shake. The shutter is on a 2 second delay, too. Click. Line up the next frame in the holder. Click. Repeat. Blow dust off with a rocket blower as necessary.
It doesn’t take long to digitize a roll of film. Editing takes much longer.
Update: remote controlling the camera in live view over USB by Lightroom Classic is easier/faster than using a remote to trigger the shutter.
Update 2 (July 2023): I’m now using my wife’s old Canon 70D instead of my even older Canon 7D. For this use the 70D, short extension tube, and 50 mm f/1.8 is just right to digitize 6x7 120 film.
Update 3 (April 2024): Per an email request I’m adding links to the 3mf files used to print the stand and shield pictured above.