1999 December 1 (Wednesday)
I learned many things trying to get my wheels laced and true. The highlights are
- Radaelli rims are not built to exact tolerances. I’d try to get German or Japanese replacements if I were to do this again.
- The rim should be round and flat before you start to lace the wheel.
- Keep the wheel round and the spoke torque equal. If you can also keep the lateral runout within specs great, but don’t try for perfection (especially when using Radaelli rims).
- A spoke torque wrench would be nice, but a fish scale with a cheap spoke wrench works in a pinch.
- Don’t try to be a perfectionist.
Wheel check
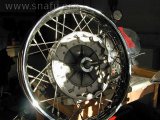
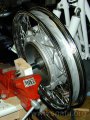
Checking runout
Brake hub side
This is where I reversed the wheel on my latest “stand” to check the tolerances on the brake surface. With equal tension on the spokes the run-out wasn’t nearly what it was on an earlier try. One wheel was .002, the other was .008. Both are high, but experienced people tell me I won’t feel anything less than .015 or so.
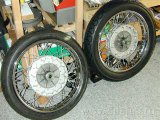
Wheels true
Still round
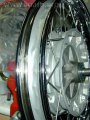
Duct tape
Other wheel
Both wheels are done. I added duct tape to cover any sharp edges after checking that no spokes protruded into the tube area. I plan on also using a rubber protection strip. Belts and suspenders.
1999 December 9 (Thursday)
I picked up the wheels today from CCM in San Jose where tires were being installed and balanced. I can do that job myself, but was feeling lazy. The front got a 90/90 x 18 ME-33 (a bit smaller than the 3.50 x 18 stock tire) and the rear got a ME-99A 4.00 x 18 (a bit larger than the 1966 stock 3.50 x 18, but the size used for the R69 US models).
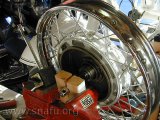
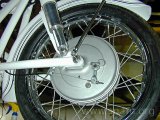
Tires and hub cover
Tires mounted
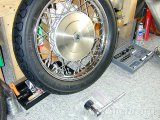
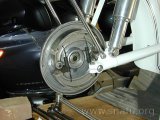
Stainless hub cover
The first picture are the wheels with tires as them came back from CCM. I then added the stainless hub covers. The combination of new, shiny rims with the stainless hub cover looks great.
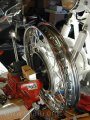
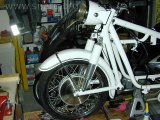
Installing front wheel
Brake hub fit
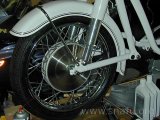
Front wheel installed
Front wheel installed
I made sure that the brake hub fit in the front swing arm slot before mounting the wheel. The concern was that it wouldn’t fit because of the paint. No problem. I then installed the entire front wheel.
Front brake lever
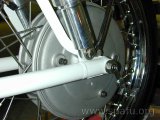
Missing brake lever
Brake cable routing
DON’T DO THIS. Notice the missing brake lever in the first picture. Hint: you can’t install it with the hub mounted. Oh well. The second picture was taken after removing the axle and moving the hub back enough to mount the lever.
I may have to do this a couple more times to get the lever exactly where it needs to go. The second picture is a rough approximation of brake cable routing. Nothing has been adjusted yet.
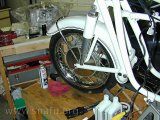
Free standing
Frame with front wheel
The frame is quite solid sitting on front tire and center stand. It is the first time the bike hasn’t needed external support in over a year.